How to Add Users to Google Tag Manager
To add users to a Tag Manager account:
- Click Admin.
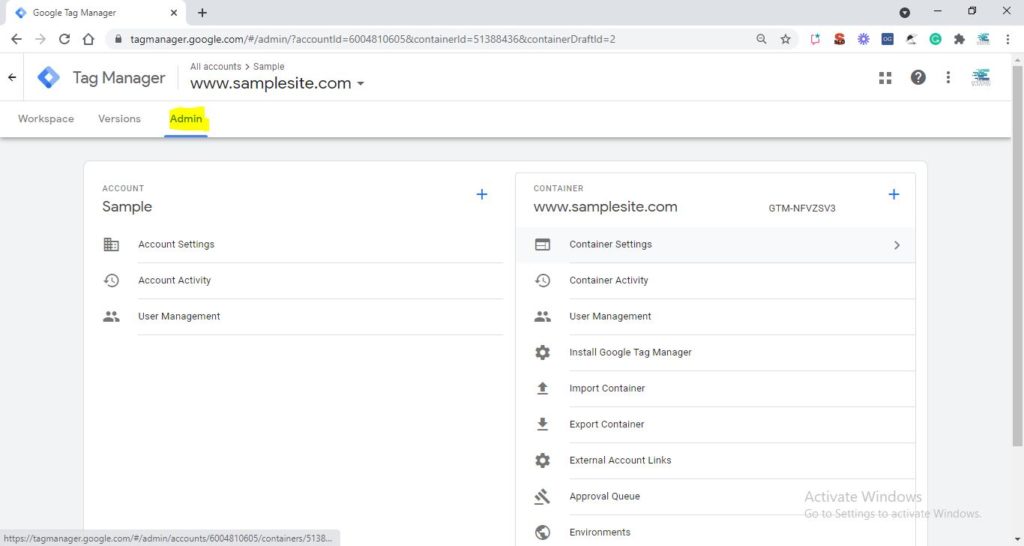
2. In the Account column, select User Management.
3. Click.
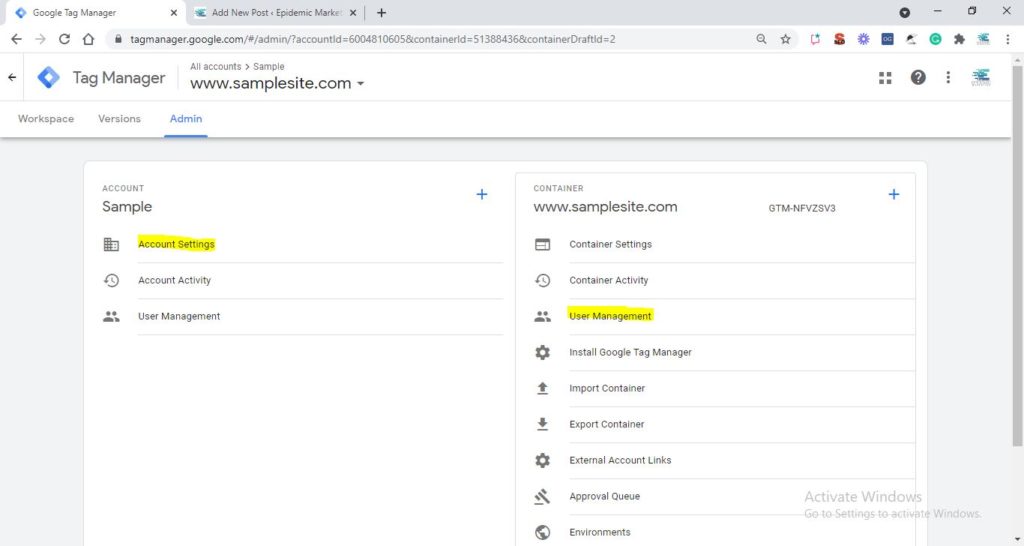
4. Select Add new users.
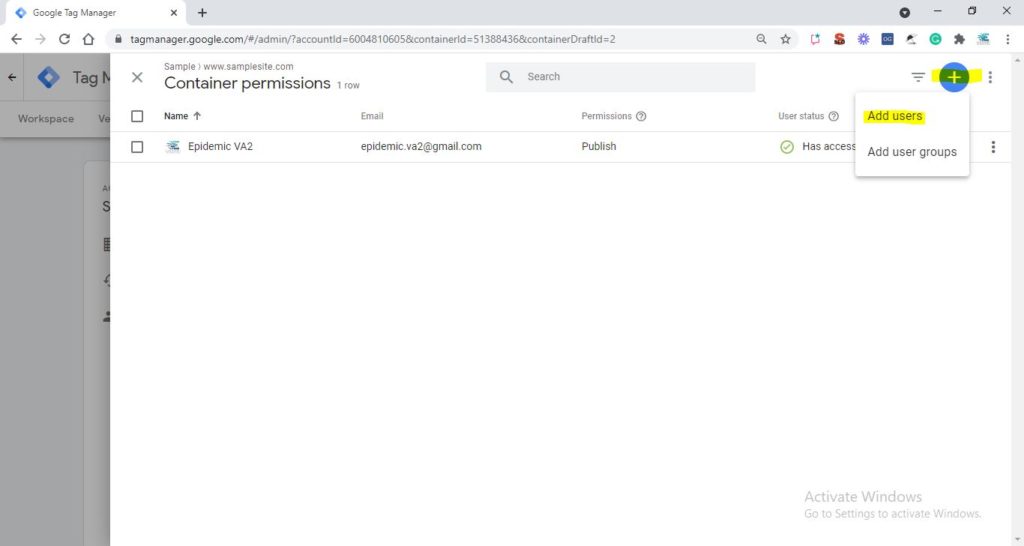
5. Enter one or more email addresses.
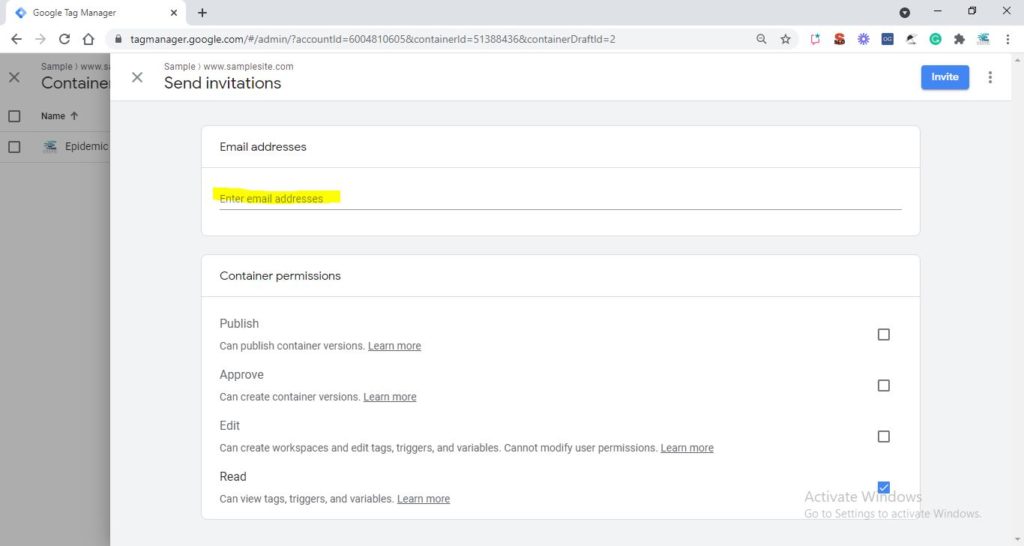
6. Set Account Permissions. User is selected by default, and this level allows the user to view basic account information. Select Administrator if the user should have the ability to create new containers and modify user permissions for accounts and containers.
7. Optional: Set Container Permissions for each container that you would like the user to have access to.
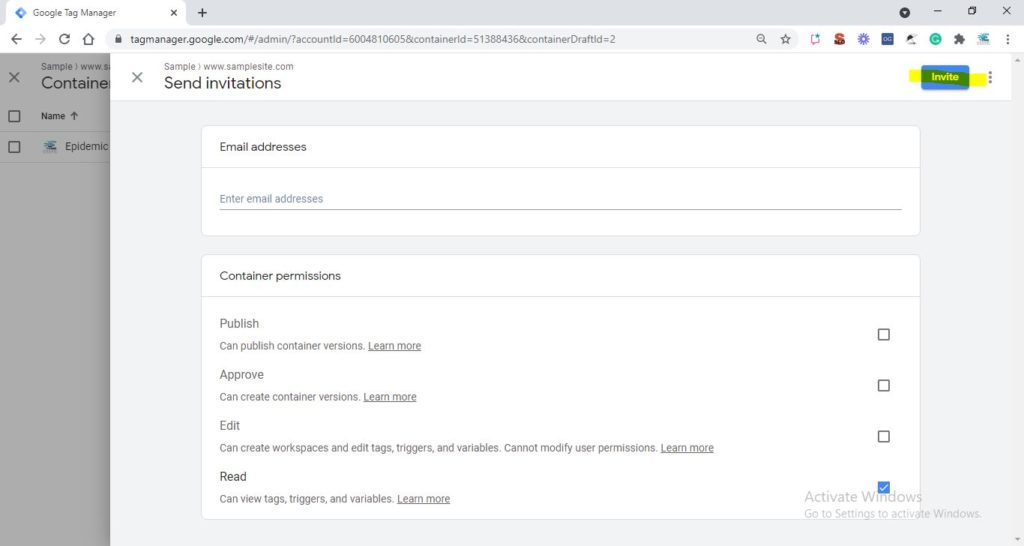
8. Click Invite. Each invited user will receive an invitation to use the container.
How to Set Up a Google Analytics Account
To start collecting basic data from a website:
Create or sign in to your Analytics account:
- Go to google.com/analytics
Do one of the following:
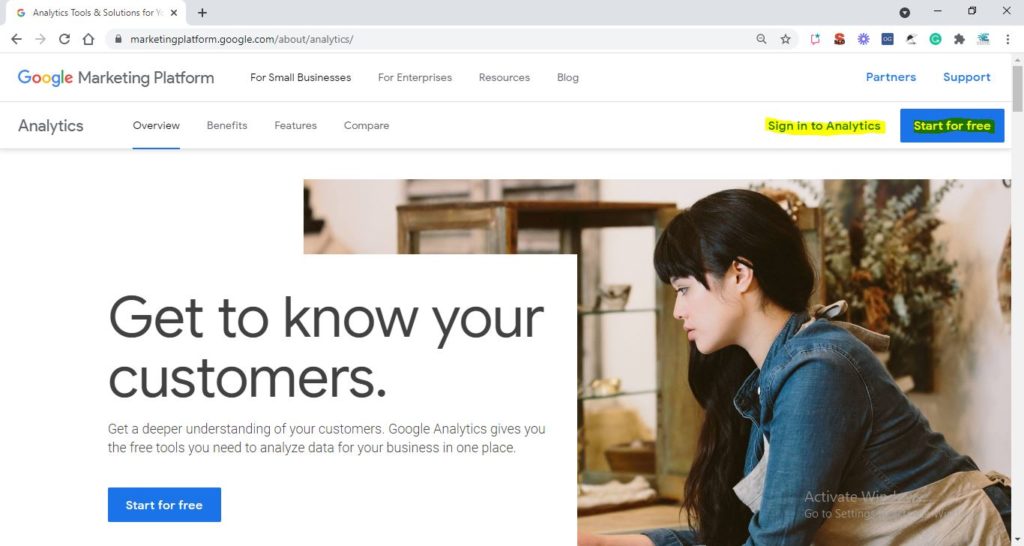
- To create an account, click Start for free.
- To sign in to your account, Click Sign in to Analytics.
2. Set up a property in your Analytics account. A property represents your website or app, and is the collection point in Analytics for the data from your site or app.
3. Set up a reporting view in your property. Views let you create filtered perspectives of your data; for example, all data except from your company’s internal IP addresses, or all data associated with a specific sales region.
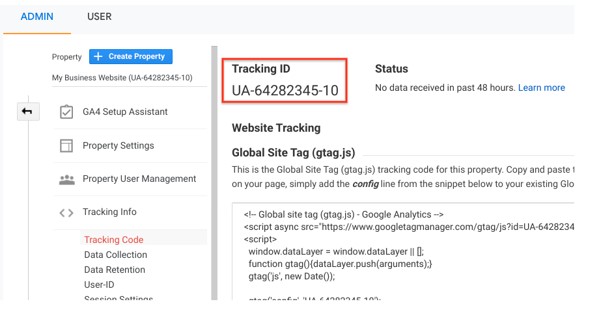
4. Follow the instructions to add the tracking code to your website so you can collect data in your Analytics property.
Create an Analytics Account
Your first step is to set up an Analytics account unless you already have one. Skip to creating a property unless you want to create a separate account for this website. For example, you might want to create another account if this website belongs to a separate business.
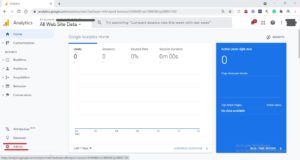
In Admin, in the Account column, click Create Account.
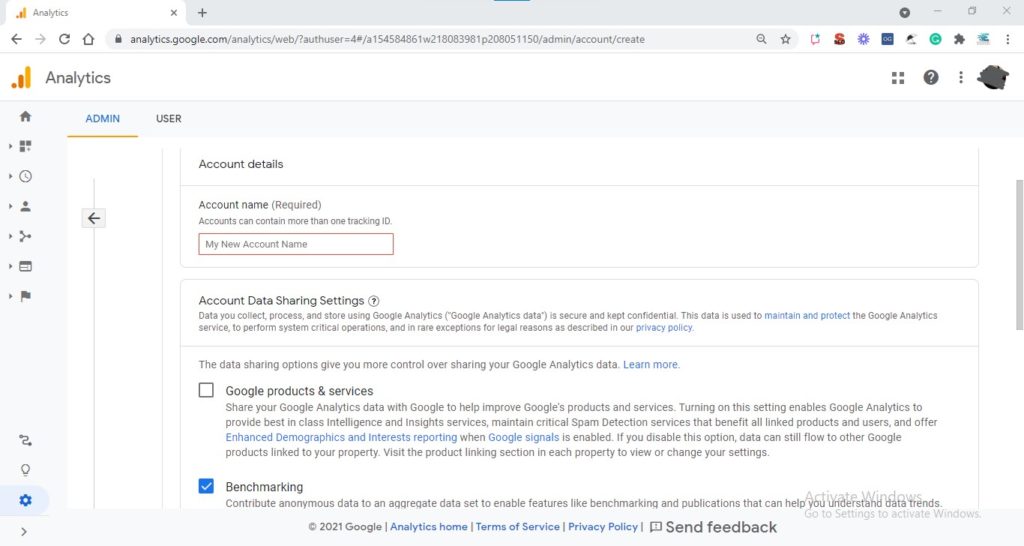
Provide an account name. Configure the data-sharing settings to control which data you share with Google.
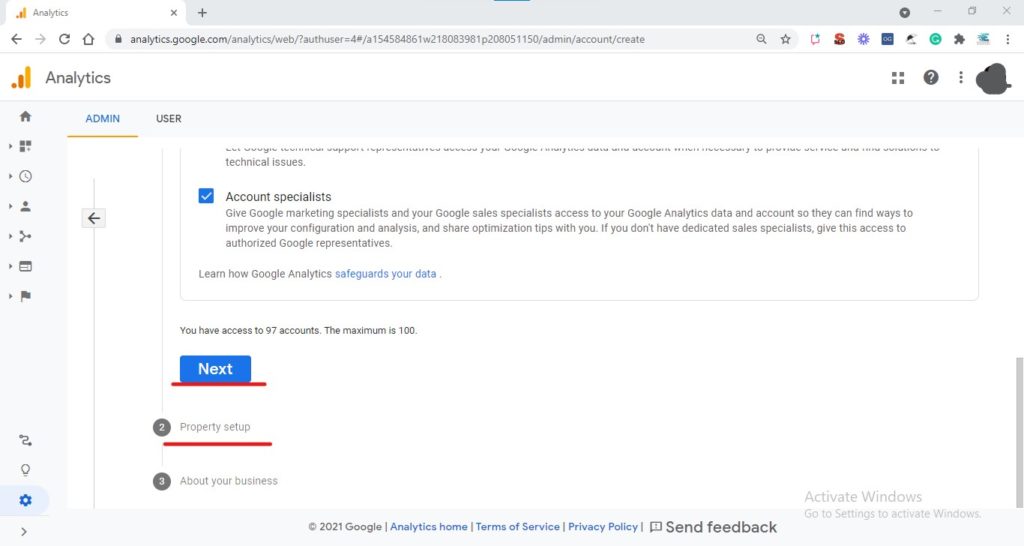
Click Next to add the first property to the account.
Create a property
- Are you continuing from “Create an Analytics account”, above? If so, skip to step 2. Otherwise,
- In Admin, look at the Account column to make sure that you’ve selected the right account. Then, in the Property column, click Create Property.
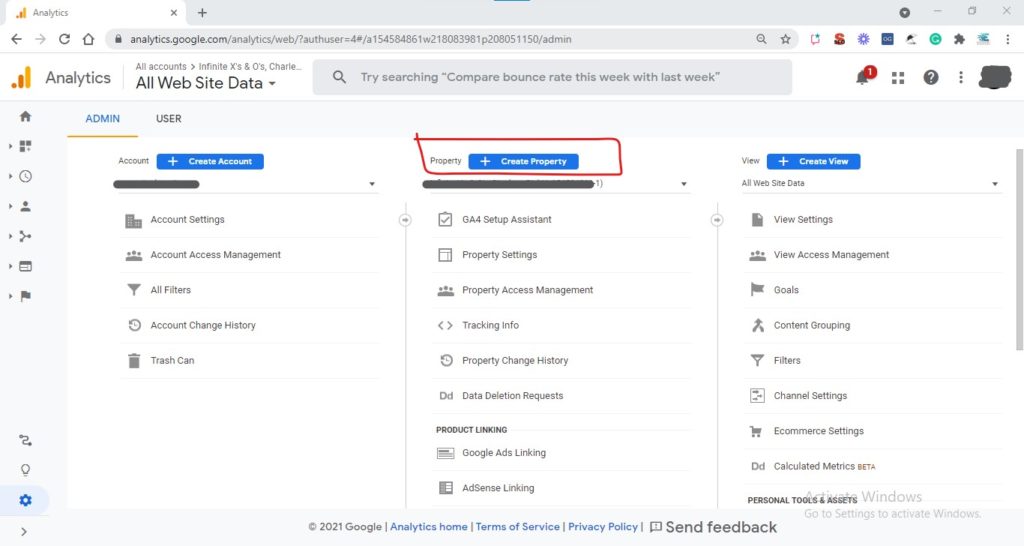
- In Admin, look at the Account column to make sure that you’ve selected the right account. Then, in the Property column, click Create Property.
- Enter a name for the property (e.g. “My Business, Inc website”) and select the reporting time zone and currency. If a visitor comes to your website on a Tuesday in their time zone, but it’s Monday in your time zone, the visit is recorded as having occurred on Monday.
- If you choose a time zone that honors Daylight Savings Time, Analytics automatically adjusts for time changes. Use Greenwich Mean Time if you don’t want to adjust for Daylight Savings Time.
- Changing the time zone only affects data going forward. If you change the time zone for an existing property, you may see a flat spot or a spike in your data, caused by the time shift forwards or backwards, respectively. Report data may refer to the old time zone for a short period after you update your settings, until Analytics servers have processed the change.
- Click Show advanced options (below the property-setup fields).
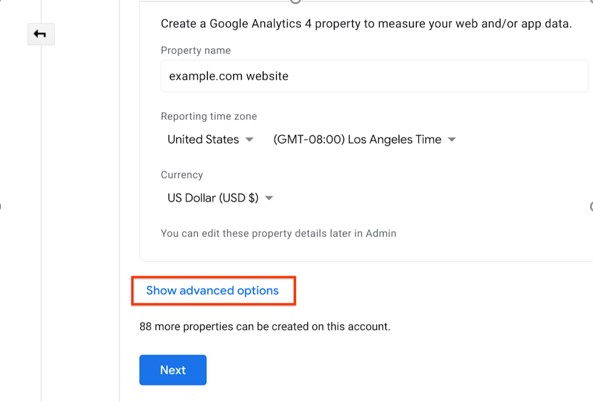
- Turn on the switch for Create a Universal Analytics property.

- Enter the website URL. Select the protocol (http or https).
- At this point, choose to create
- Both a Google Analytics 4 property and a Universal Analytics property. This option
- Sets up a parallel Google Analytics 4 property that collects data alongside your Universal Analytics property. Once you add the tag for the Google Analytics 4 property to your site, data will be sent to both properties. You can switch back and forth between properties using the property selector or Admin screen.
- Establishes a connection between the two properties that allows you to migrate configuration settings from your Universal Analytics property to your Google Analytics 4 property later on.

- Both a Google Analytics 4 property and a Universal Analytics property. This option
- Click Next and provide information about your business.
- Click Create.
How to Add Users to Google Analytics
You can add as many users as you need. To add a new user to an account/property/view:
- Sign in to Google Analytics.
- Click Admin, and navigate to the desired account/property/view.
- In the Account, Property, or View column (depending upon whether you want to add users at the account, property, or view level), click User Management.
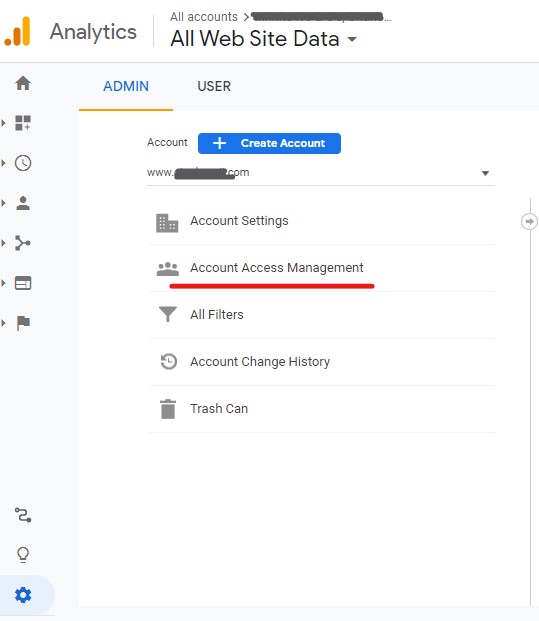
- In the Account permissions list, click +, then click Add users.

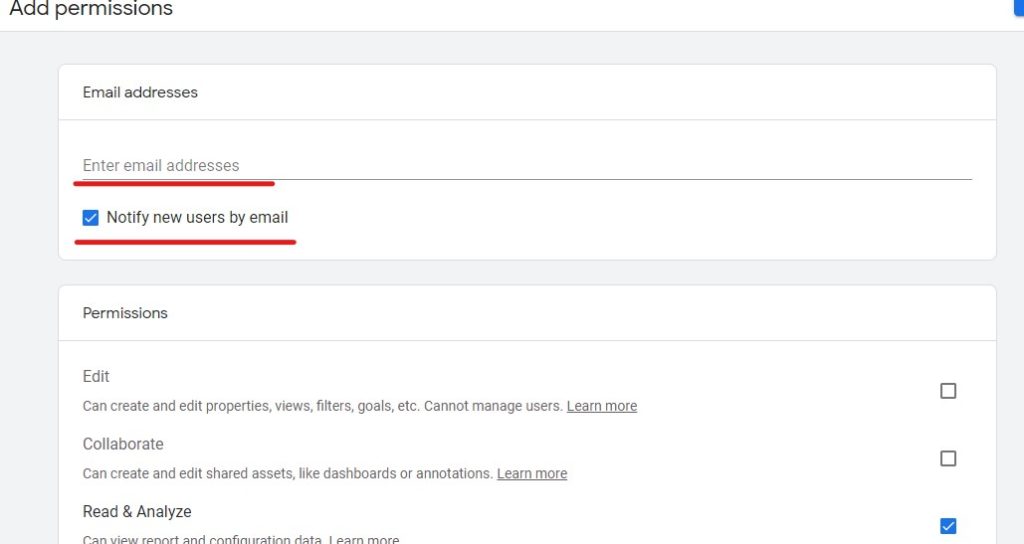
- Enter the email address for the user’s Google Account.
- Select Notify new users by email to send a message to the user.
- Select the permissions you want. Learn more about permissions.
- Click Add.
How to Add Users to Google Search Console
To add a new user:
- Choose a property in Search Console.
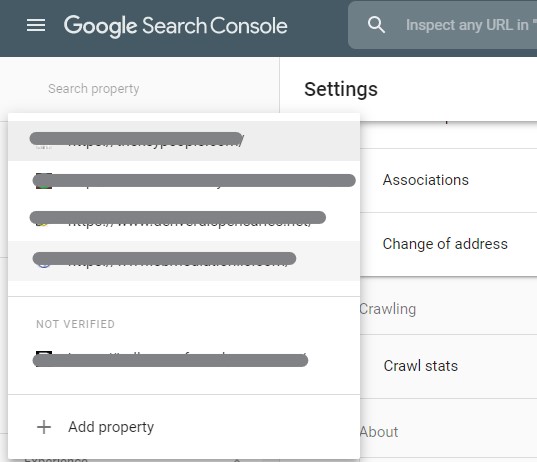
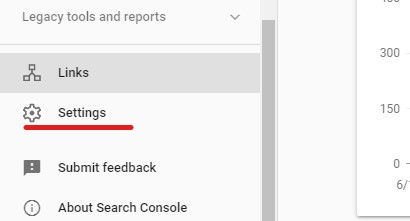
- Click the Settings icon in the navigation pane.
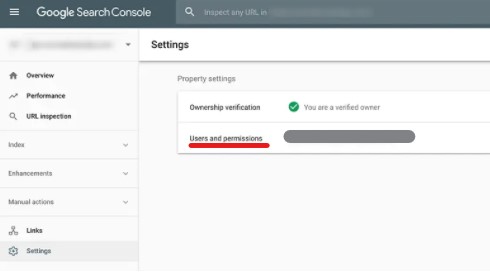
- Click Users & permissions.
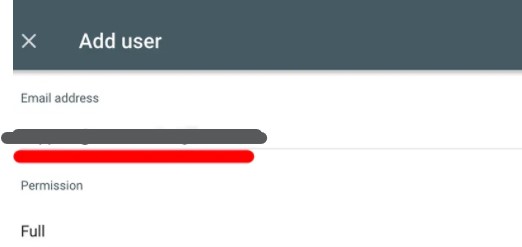
- Click Add user and select the permissions to grant the user. Type the Google Account name (email) of the new user.

- Choose the permission level to grant the user.
- The new user must add the property to their property list in order to access it.
How to Create a Google Business Profile (Formerly Google My Business)
Add your business through Google Business Profile
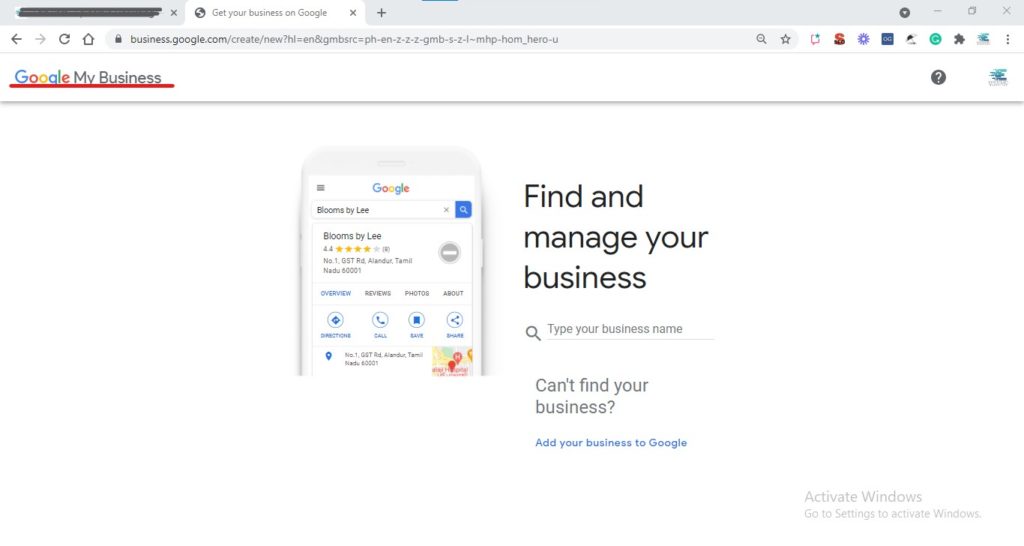
- On your computer, sign in to Google My Business.
- Sign in to your Google Account, or create one. Then, click Next.
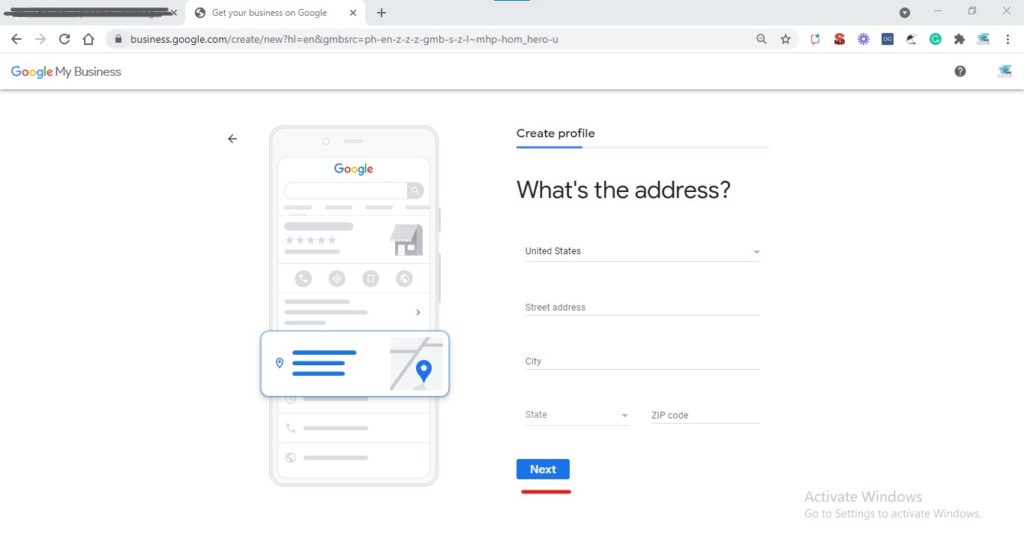
- Enter your business’ or chain’s address. Then, click Next.
- Choose how your business will display on Google Maps.
- If you serve customers at your business address:
- Enter your business address.
- Click Next. If you also serve customers outside your business address, you’ll have the option to list your service areas as well.
- If you don’t serve customers at your business address:
- Enter your business address.
- At the bottom, click I deliver goods and services to my customers Next.
- List your service areas, then click Next.
- If you serve customers at your business address:
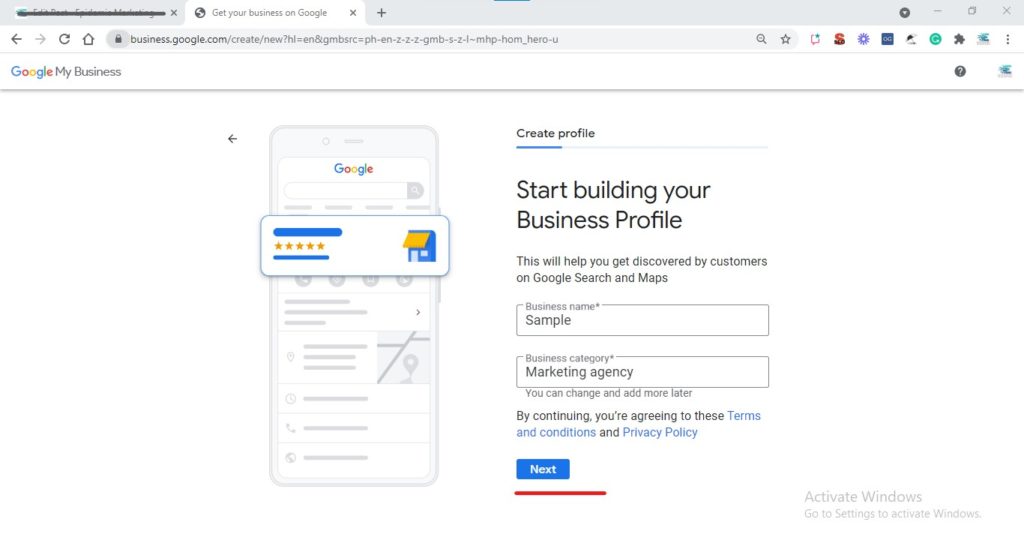
- Search for and select a business category. Then, click Next.
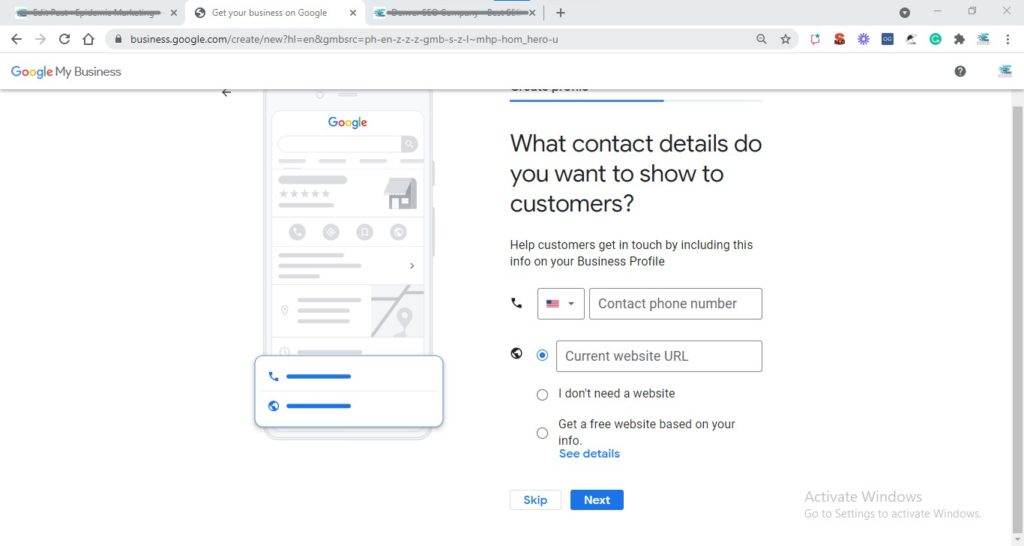
- Enter a phone number or website URL, then click Finish.
- Select a verification option. It’s recommended that you review your information before you request verification.
- To verify now, at the top, find the red banner and click Verify now.
- To verify later, click Verify later Later.
- If you’re not authorized to manage the Business Profile for the chain, find the person in your organization who’s authorized and continue the process.
How to Add a Manager to Google Business Profile (Formerly Google My Business)
Add owners & managers
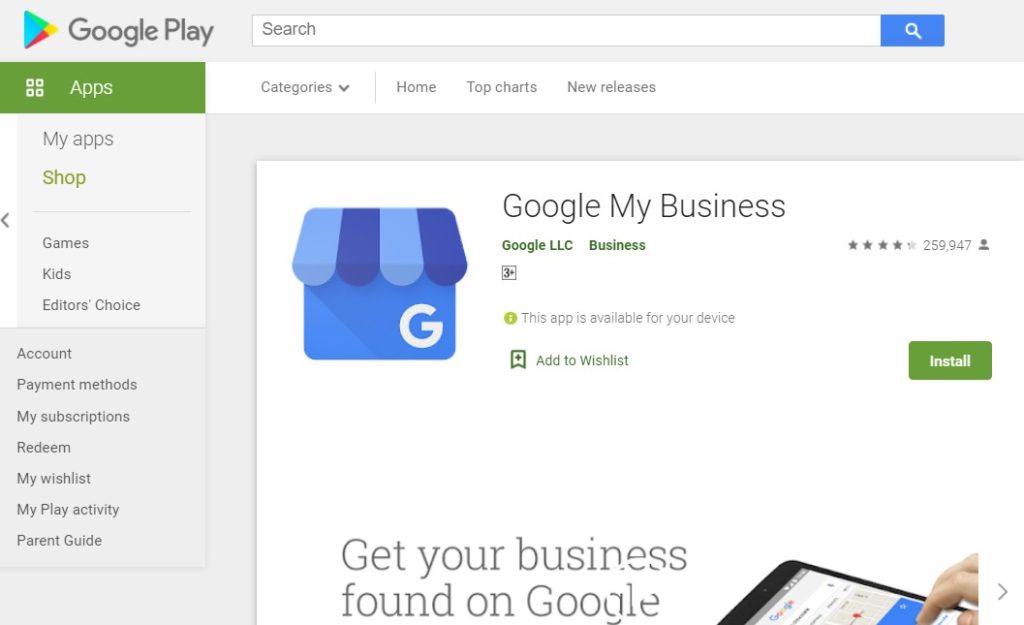
Note: Starting in July 2022, the Google My Business mobile app will be replaced by the Google Maps app. You can start managing your Business Profile on Google Maps and Search. If you don’t have the Google Maps app, download it now to easily update your business information and connect with your customers. As we get more information on the new app we will update the instructions.
- On your Android phone or tablet, open the Google My Business app.
- If you have multiple locations, open the location you’d like to manage.
- If you have multiple locations, open the location you’d like to manage.
- Tap Menu Manage users.
- At the top right, tap Add user .
- Enter the name or email address of the user you’d like to add.
Note: To add an agency to your location, you need to add the agency’s location group ID here. (You might need to reach out to the agency and ask for this ID.) - To select the user’s role, choose Owner, Manager, or Site manager.
- Confirm the email address, then tap Send.
This page displays all active users, as well as people who are invited to become users. To cancel pending invitations, next to the invitation you want to remove, tap More Remove.
When an invitation is accepted, the owners of the profile are notified through email. All users in the account can view the names and email addresses of the owners and managers of the profile.
Tip: If you want to transfer ownership of your profile to someone else, you can learn how to transfer ownership of a profile.
How to Add a User to YouTube
Add or remove access to your YouTube channel
If you have a Brand Account, you can now use channel permissions to add or remove access to your YouTube channel instead. Learn more.
You can have multiple people manage your channel without giving them access to your Google Account. Inviting someone to manage your channel:
- is safer than sharing your password.
- lets you give only the amount of access they need.
- is less confusing by making the user comment or view videos on YouTube with their own channel.
Limitations
Right now, people you’ve invited to manage your channel:
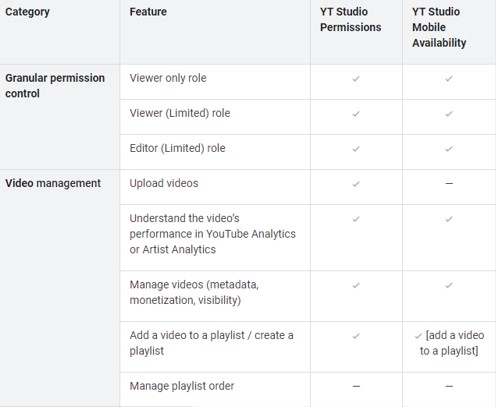
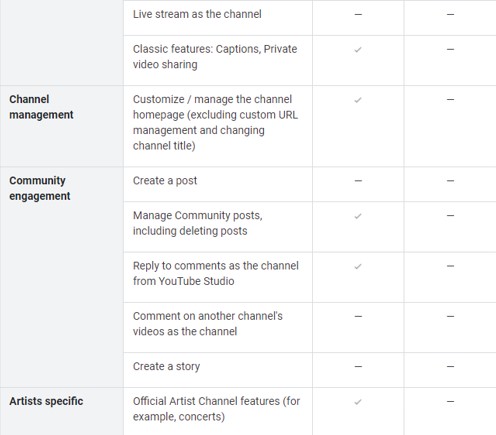
- can only manage your channel in YouTube Studio on a computer or partially on mobile.
- can’t manage via YouTube.com or YouTube APIs.
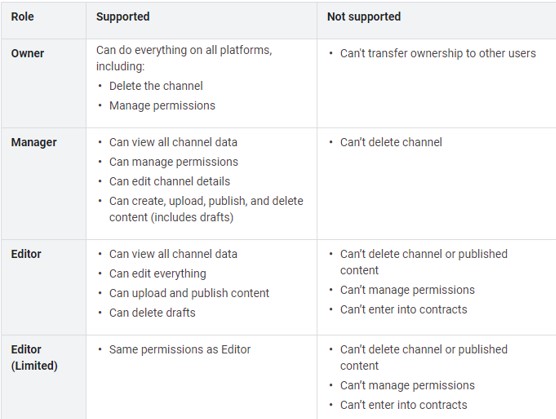
- can’t do certain actions in YouTube Studio (See the table below).
Note: Channel permissions are still in development, so check back here to see if new features are supported.
To add access:
- Go to studio.youtube.com.
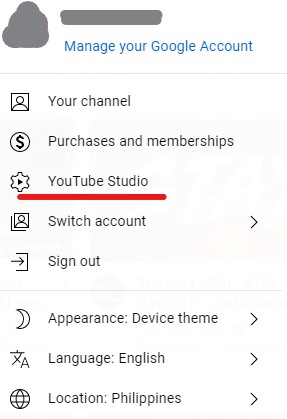
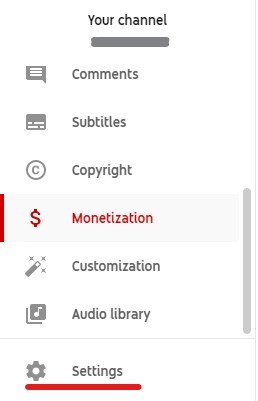
- On the left-hand side, click Settings.
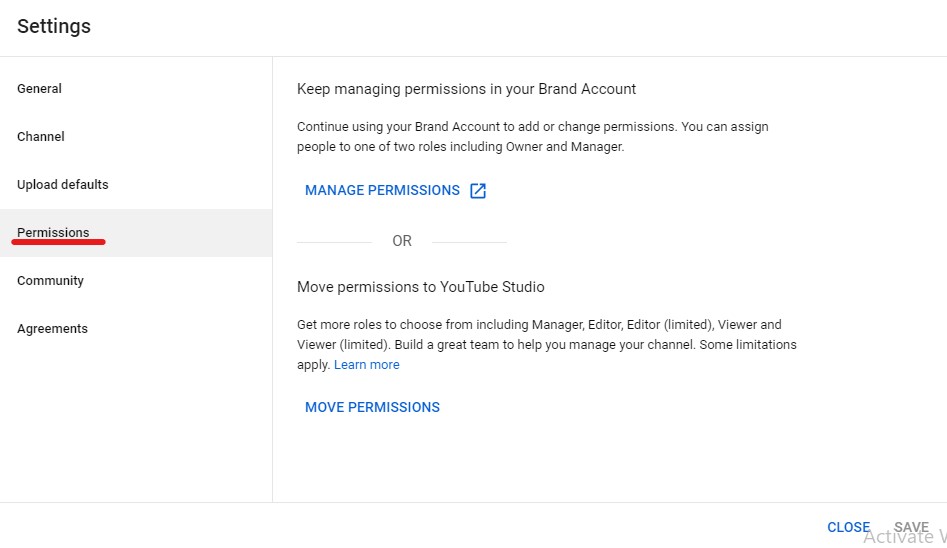
- Click Permissions.
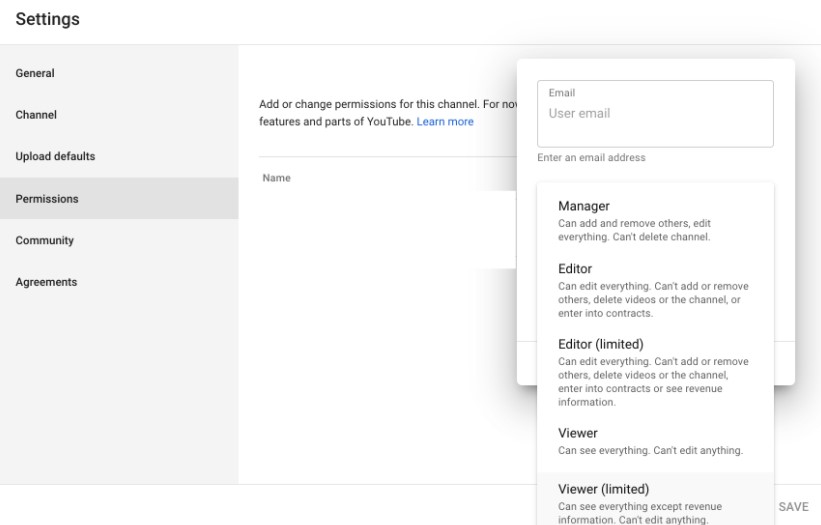
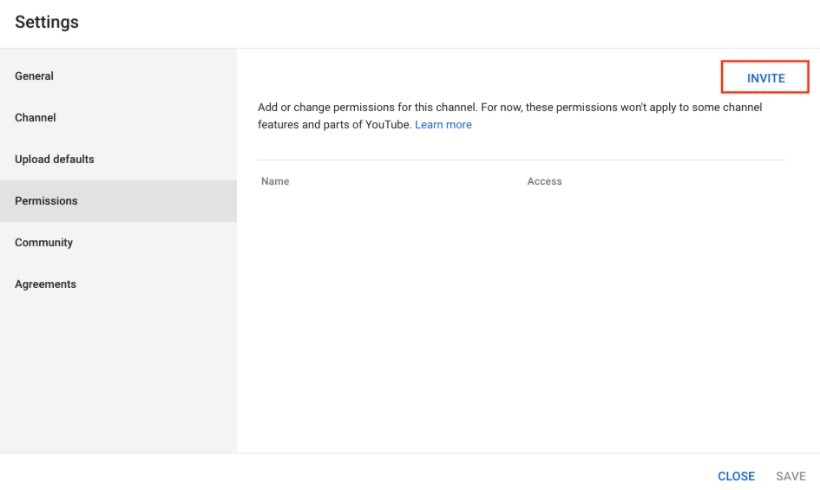
- Click Invite and enter the email address of the person you’d like to invite.
- Click Access and select the role you’d like to assign to this person.
